
I don't even know where to start this post, because it was one of those work (scratch that--creative play) days that ended up totally different than where I started out. The hearts above were one example of the very happy end results.
I wanted to get some samples ready for my class this Tuesday, 11/18/14 "Make Your Own Embellishments" where we'll be making alphabet stickers and clay embellishments in this session. I wanted to start by creating some watercolor backgrounds using Tim's Mini Distress Inks. I had seen a few videos where people were using the small square size to lay down the ink direct to paper. These videos were just some of the reasons why I just HAD to have ALL of Tim's minis! So, here's a picture tutorial of how my day went:

I began by taping my 5-1/2" x 4-1/4" piece of watercolor paper to a wooden pizza peel (I was inspired to make this wonderful purchase by Jennifer McGuire--she uses a wooden cutting board with a handle--pizza peel was less expensive!). The purpose of this is so I can easily lift the board and turn my project to and fro to get great blending drips when it's wet.

I stamped down each color of ink until the page was full. I actually went off track here, because I couldn't decide which set of colors I wanted to choose. I decided to make one of each set so I have them for my color swatch book.

I misted water over the entire sheet and let it sit for a few moments to do it's thing.

I tilted the pizza peel back & forth, slowly, to get some awesome drips & blending of colors.

I added more water, and tilted again until satisfied. I stopped here, because I didn't want to lose all the yellow.

Look at that beautiful bleeding!

Dried with a heat tool...

...removed the tape, and voila! I repeated this process for all 12 sets of Tim's Mini Distress Inks.

I trimmed all four edges of each piece so they ended up 5-1/4" x 4".


When finished, I mounted each card onto a sheet of white cardstock. On my computer, I made a sheet of which colors were in each set. I printed out one for my book ...

... and another on vellum to attach to each card.

While cleaning up, I scooped together all the trimmed edges. Hmmmmm. What if I ...

... run these through one of my Xyron machines ...

... making them sticky ...

... and adhere them to a piece of cardstock? Very cool! Now, what to do with this gorgeous piece of new art? Die cut it of course!

I wasn't sure if the framelit would work because of the thickness of the watercolor paper on top of the white cardstock, but never fear ...

... success!

I didn't want to waste any of this precious paper, so I squeezed out two more smaller hearts.
Not done there. I made this paper using the 4-1/4" shorter trimmed pieces. Since my experiment worked, I did the same with all the longer, 5-1/2" pieces.

Using the Xyron machine can get very messy, especially with such thin strips. There was extra adhesive all over the top.

I used the adhesive remover from Stampin' Up!

and easily cleaned off all the excess adhesive.

Since it worked so well cutting the hearts, I wanted to use my new script word dies. Love these things, and I started collecting a few.
Well, no matter how many times I passed through my Big Shot machine, these just wouldn't cut all the way through (next time, adhere to copy paper instead of white cardstock). I tried adding shims and everything. I couldn't let this go to waste, so I spent the next hour carefully fussy cutting these pieces out.
I had a few rips and tears, but I wasn't going to waste this paper! I carefully glued them together, and cut each word out again from white cardstock. I glued the white to the bottom of each piece to make them more secure, and it worked!
I added some Close to My Heart Liquid Glass (works the same as Ranger's Glossy Accents or Stampin' Up! Crystal Effects--just happened to be the one I grabbed) to add a clear & dimensional top. *I also used this as the glue to repair & layer them.
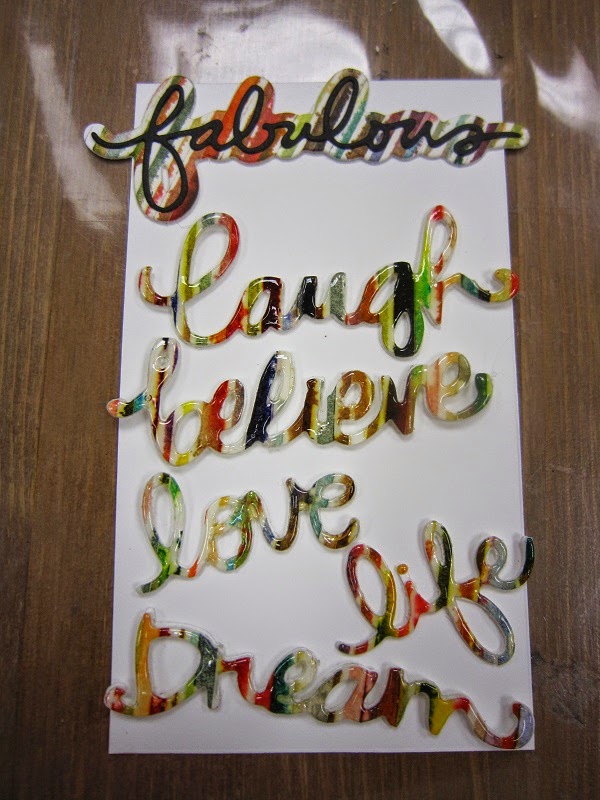
And, after all that work, this is what I got. The word "fabulous" was a 2-piece die. I just did the background layer, left it matte, and added the word on top using textured black cardstock.

Love 'em! Can't wait to use these on my next project, a card, or scrapbook layout!

After all that experimental play, I realized I still hadn't cut any alphabets. lol I made an extra sheet of watercolored background paper using Set #12, same process as above, and then die-cut the letters as samples for my class. And, this was only one of my ideas! Today, more play!


